Legacy ToneDexter – Setup and Training
These videos show the original ToneDexter, but the general principles are the same with ToneDexter II, now with simpler training and enhanced WaveMap quality and control.
Convert the Mic Sound of your Instrument Into WaveMaps in ToneDexter. Get Started Fast by checking out the ToneDexter Setup and Training Video…
ToneDexter WaveMaps
By way of introduction, a WaveMap® is a transformation filter that ToneDexter creates, stores, and uses. It is also known as an impulse response (IR), and is used to process the sound of the pickup to make it sound like your microphone.
It’s necessary to create at least one WaveMap for your particular instrument by training ToneDexter with a microphone. Once that’s done, the mic is no longer needed.
Up to 22 WaveMaps can be stored, in two banks of 11 each. These can be for the same instrument with different mics or mic positions, or for different instruments. ToneDexter does not come with any existing WaveMaps.

Preparing for Training ToneDexter
Guitar and Mic Setup…
- ToneDexter comes with software optimized for Acoustic Guitar, Dobro, Viola, Cello, Bazouki, Mandola, Mandocello, Baritone Guitar. Separate versions of software are available for (HGH) higher pitched instruments like Violin, Mandolin, Banjo, Ukulele, and (BAS) a version optimized for Upright and Bass. See the Support page for more info on installing these different versions. Before training make sure you install the version appropriate for your instrument.
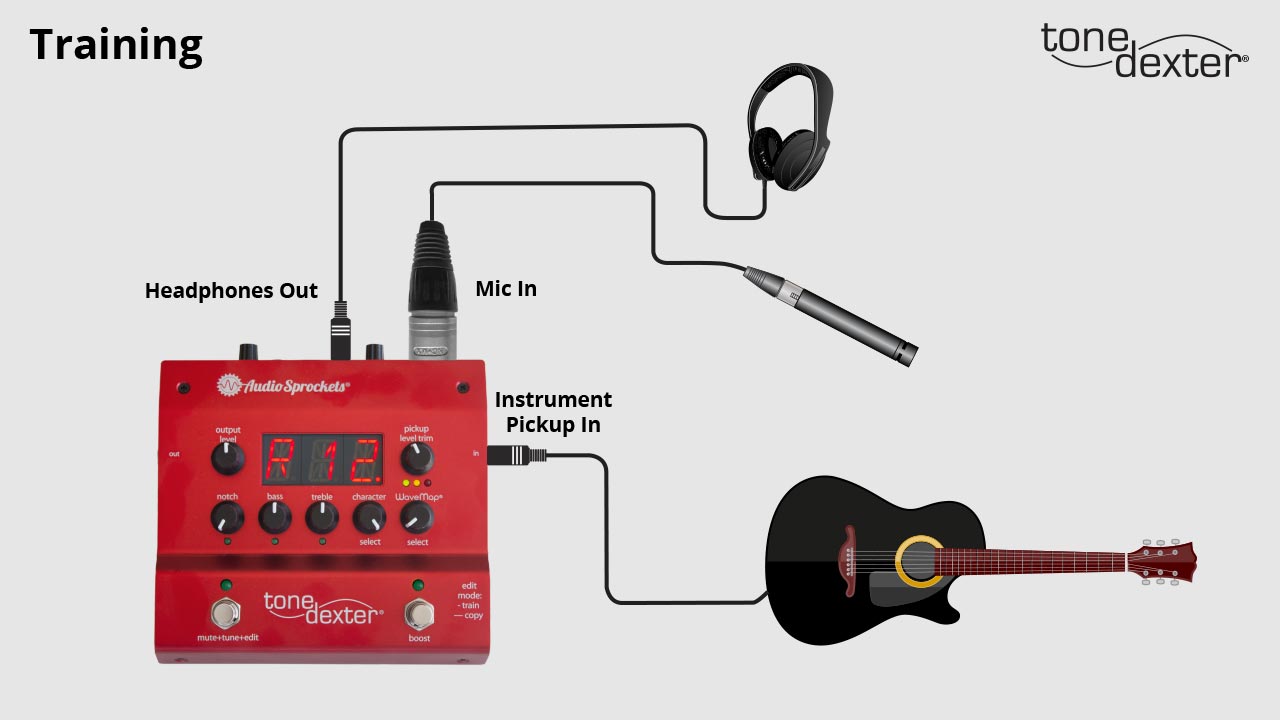
- Plug headphones and your acoustic instrument pickup into ToneDexter, switch off any active EQ settings in your guitar. ToneDexter only works with piezo pickups found in most acoustic instruments, not magnetic pickups.
- Plug a mic into the rear mic jack which provides 48v phantom. Check out the user guide for more info about mic selection.
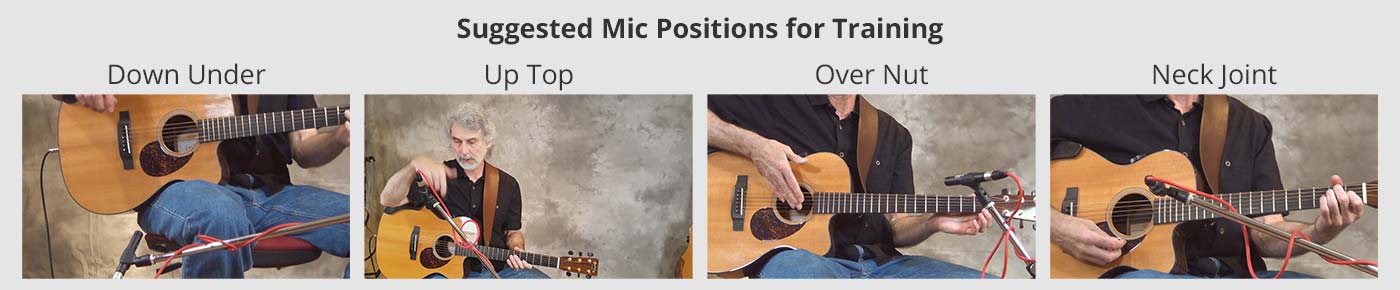
- Position the mic in front of your instrument in a place that sounds good. There are four suggested mic locations:
-
Down under: 6” out and 6” down from the bottom hollow of the guitar, point the mic up at where the picking hand is.
-
Up top: The mirror image of down under, on the upper (bass) side.
-
Neck joint: 10” – 15” away in the front, pointing straight at the place where the body meets the neck.
-
Over nut: 12-15” directly above the nut, pointed back at the sound hole.
-
- Listen on headphones, play and adjust the Pickup Level Trim so the middle yellow LED lights with moderate to strong playing.
- Try switching the Phase switch on the rear to get the most bass, this only affects what you hear in headphones.
 The User Guide includes detailed notes about setup, training and operation.
Current version is 2.0. Earlier versions are available from the Support page.
Helpful Setup Hints
- ToneDexter automatically makes corrections when creating the WaveMap to improve feedback immunity for live use, from slots 1-21. If you are training ToneDexter for a sound you will use in the studio for recording, then set the WaveMap Select knob to R22, for the most mic-like sound without feedback adjustments – the A/B bank switch on the back switches between banks R1-11, and R12-22. Either type of WaveMaps may be stored into any location.
- Once you are setup don’t move the position from your mic to the instrument while training for that particular sound.
- You can store several WaveMaps using different mics and/or mic locations, and decide later which ones to keep or move to different locations
- You can train anywhere you don’t need a refined acoustic space as the WaveMap picks up very little of the room sound.
Training ToneDexter
Learning Phase…
 Tap the Mute switch to enter MUTE&TUNE mode, then tap the Boost switch to enter TRAIN mode. The display will show LV (for level), and a rotating bar. At any point during the training, you can abort the process by tapping the Mute switch. This will take you back to MUTE&TUNE mode where you can easily start over, or go back to RUN mode.
- Level Setting Phase – Auto adjust mic level by repeatedly strumming the upper 4 strings at the 4th or 5th fret, middle range double stops for violin, or arco open A or D string for upright bass.. The rotating bar will stop when the automatic level adjustment is finished.
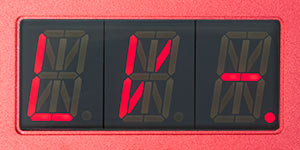
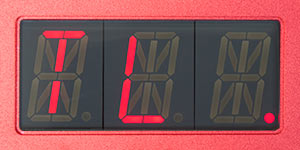 Learning Phase – Once the rotating bar stops, the learning phase has begun, and the display will show TL_.
- During the learning phase, it is possible to toggle back and forth between the training-in-progress sound TL_ and the mic sound ML_ by tapping the Boost switch. This way, you can hear the mic in the headphones and adjust its position as necessary to achieve the sound you want. If you do adjust the mic position, tap the Mute switch to abort the session and then tap the boost switch to start again, as the levels will be incorrect if you don’t start over after moving the mic.
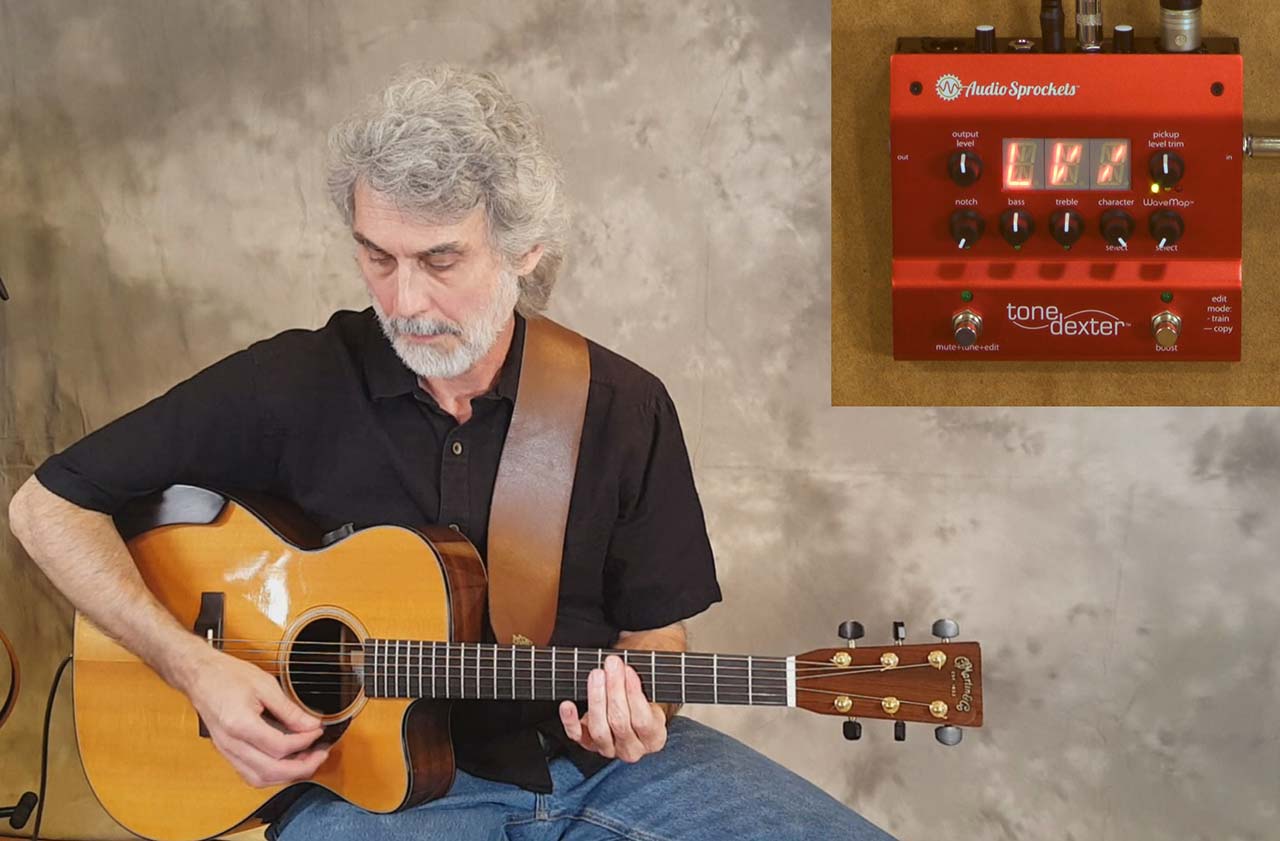
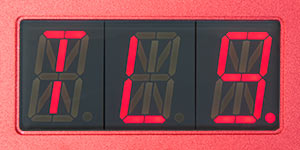 With the display showing TL, start playing, and ToneDexter will learn your sound. Just play normally and cover the entire range. You can stop playing at any time then resume, but keep the same mic to instrument position. The display will increment from TL1 to TL9 in about 2 minutes as ToneDexter matches the pickup to your mic sound. Feel free to use the Boost switch to toggle back and forth between M (mic) and L (Learned WaveMap pickup sound) as desired; it will not affect training
Learning Phase Completed…
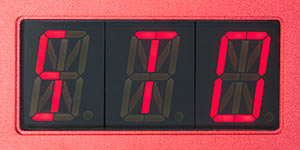
 Once the learning phase completes, the display changes to T12 (for trained, showing the current slot number, eg. 12) . This is the Freeze phase.
- To confirm that you’re happy with the new sound, tapping the Boost switch will allow you to audition the bypass pickup (display shows P for pickup), the microphone (display shows M for mic), the Wave-Map in the current slot (displays shows S for stored), and the newly trained WaveMap (display shows T for trained). It will cycle through those options in succession with repeated taps to the boost switch. If for any reason you want to start over, tap the mute switch to abort the training session then tap the boost switch to restart training.
- Once you’re sure that you like the trained sound, use the WaveMap Select knob select a preset slot in which to store the new WaveMap. As you scroll through the slots, you will hear the audio change. Occupied slots have a lit dot, empty slots do not. If the slot contains an existing WaveMap, you will hear it. If not, you will hear bypass sound. You may again audition by successively tapping the boost switch.
 To store the newly created WaveMap, press and hold the Boost switch. (It doesn’t matter which audition mode P, M, S, or T is selected when you do this.) At this point, the training session will end, the sound will change to the new WaveMap, and you’ll be back in RUN mode. Unless you want to create additional WaveMaps, the mic can be disconnected.
Creating WaveMaps for Banjo
Musician and teacher Ben Proctor, a big fan of ToneDexter, sent us this suggestion about training the Banjo…
“A couple of things I did find, in case you have other banjo players asking, that I discovered when creating WaveMaps. It’s tricky to get the wavemap right for a banjo, but once you dial it in, it’s great. It took me about 25 tries before I got to my current map. The banjo is a really complex sound with lots of weird overtones, but I think I cracked the code:
- Use a high-end LDC (Large Diaphragm Condenser) mic with multi-patterns. I used an AKG C414
- Put pattern on figure 8 or omni-directional, no bass roll-off
- Point the SIDE of the mic directly at the neck joint, like 2 inches from the banjo.
- Play in various right-hand positions on the banjo with a capo on the 1st fret during the map, starting with slow passages. Let the low strings ring out.
Anyway, some of your users might find that useful if anyone asks.”